User Documentation
Project Martha
This project is about using a Dragonboard configured with a Web IDE allowing it to be accessed over USB from a laptop or host computer. This is to enable people to create Python code quickly on the Dragonboard without the need for additional peripherals such as keyboards and monitors. This is useful in situations where you want to get set-up quickly and do some experimentation such as at workshops or hackathons.
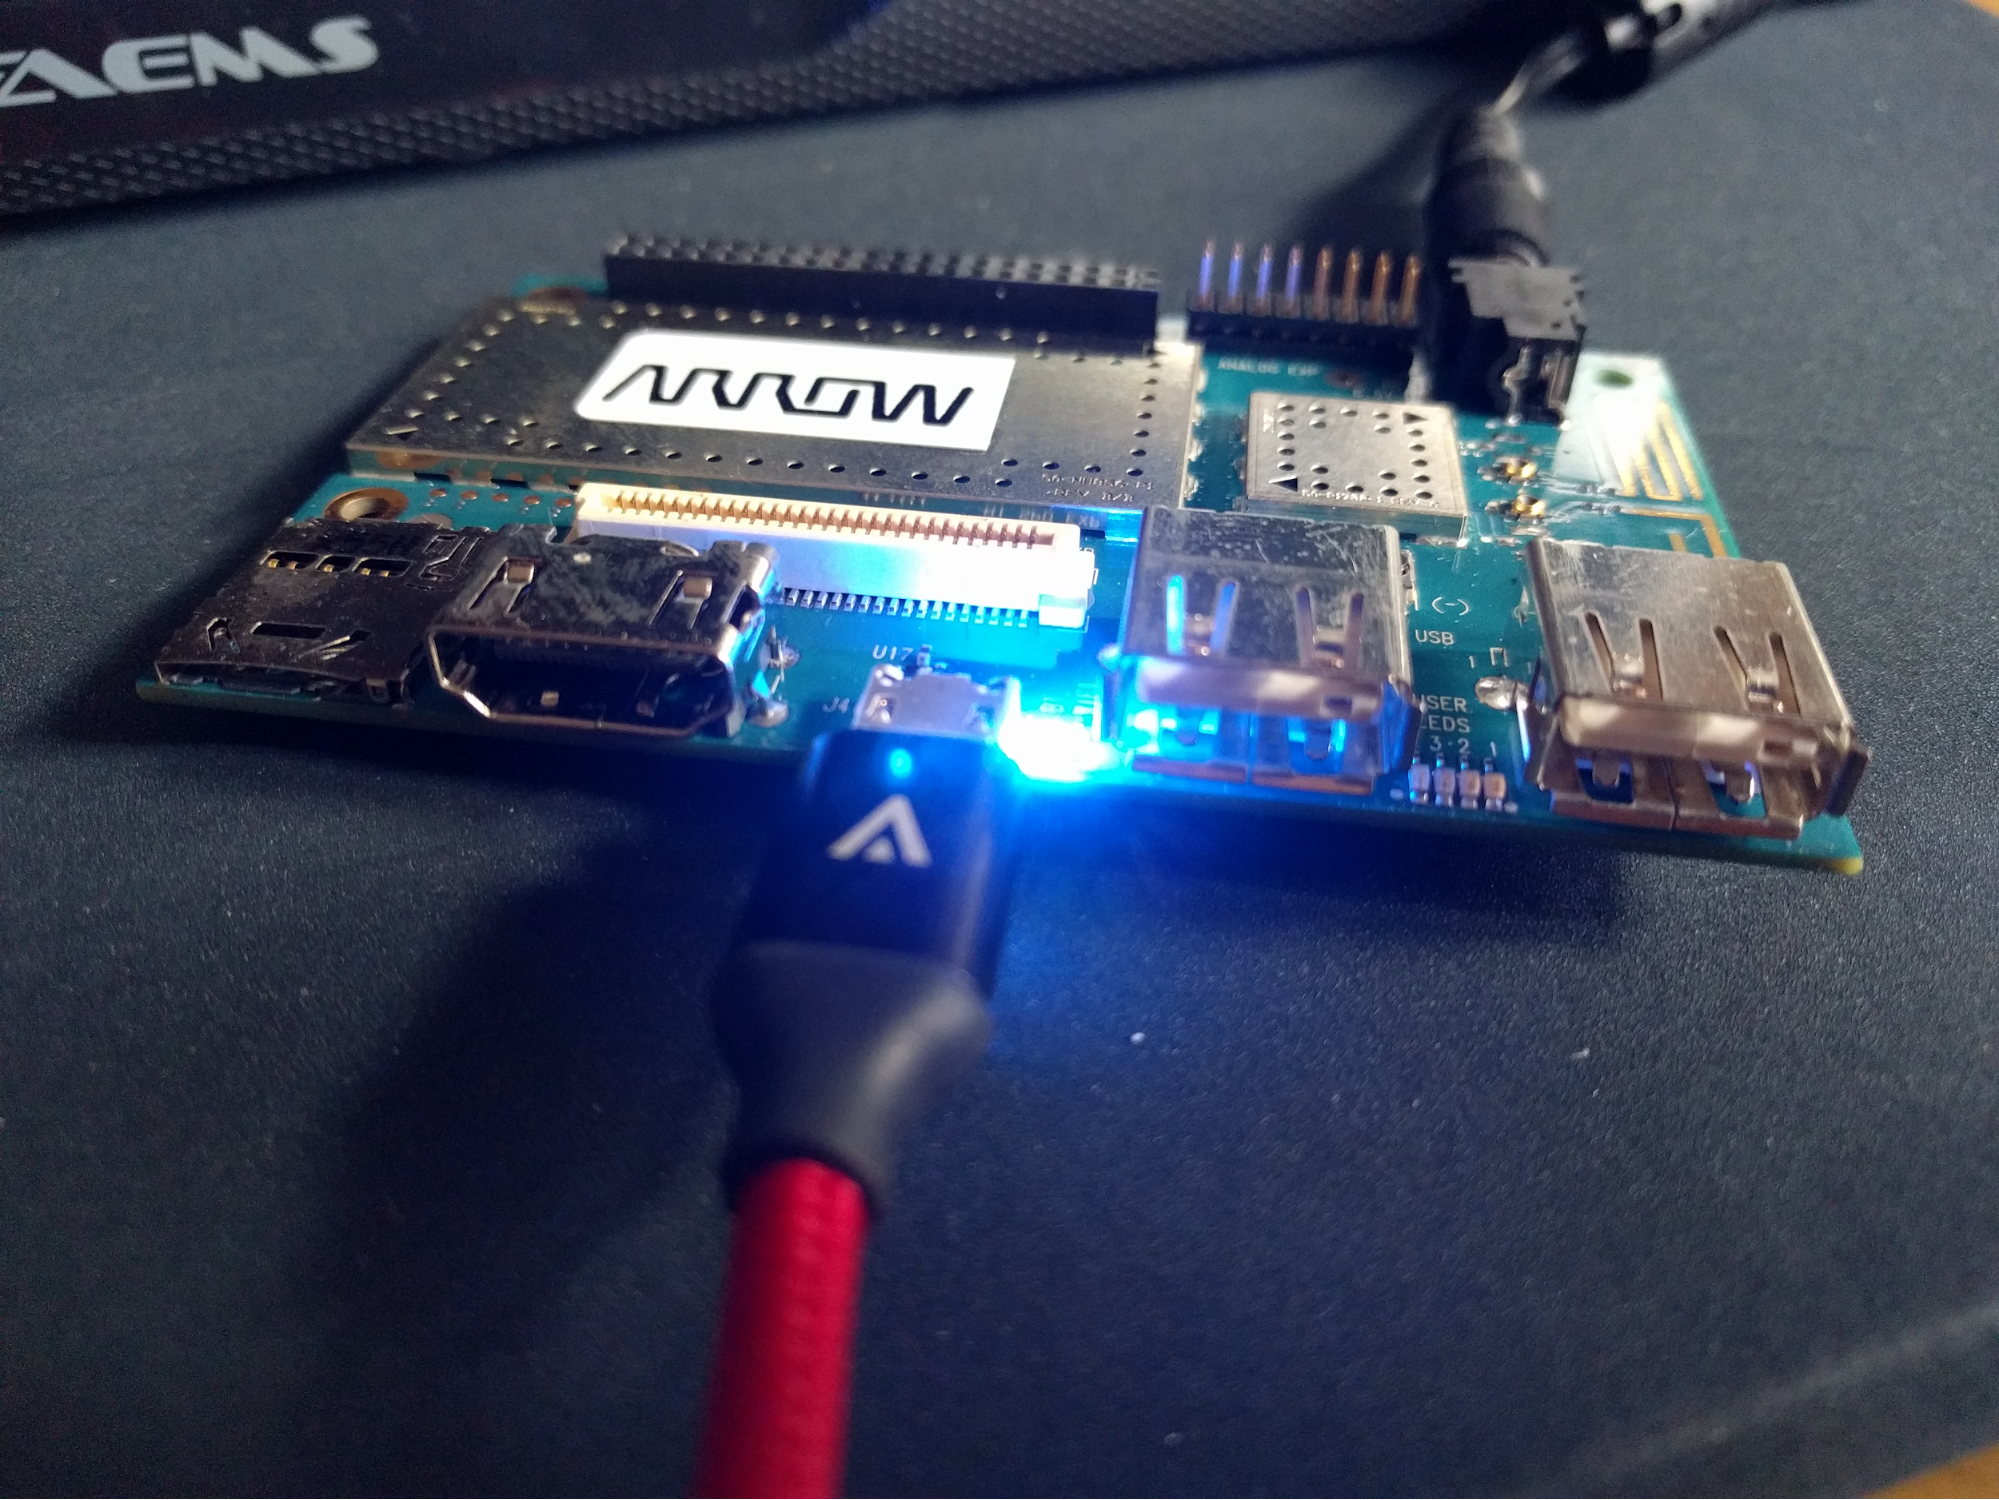
If you have a Dragonboard that is already configured with the Web IDE then plug in the USB cable to your laptop and other end into the micro-USB connector on the Dragonboard. Plugin the power cable for the Dragonboard.
You will now configure the network connection on your laptop. Choose the instruction for the operating system on your laptop
Setting up laptop
On a mac
In System Preferences > Network, configure the RNDIS/Ethernet Gadget to
have a static IP Address of 169.254.1.100 and the router value
of 169.254.1.1
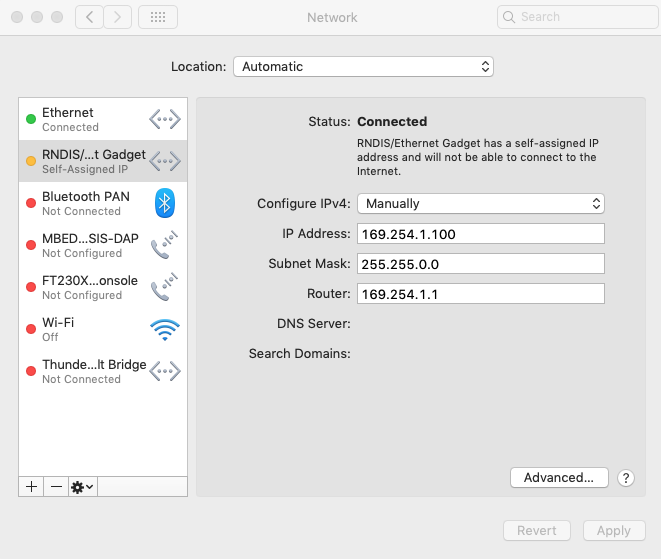
Open a browser on your mac and type in the URL http://169.254.1.1:8080
On a Chromebook
In Settings configure the Ethernet connection to have an IP Address
of 169.254.1.100 and Gateway to 169.254.1.1
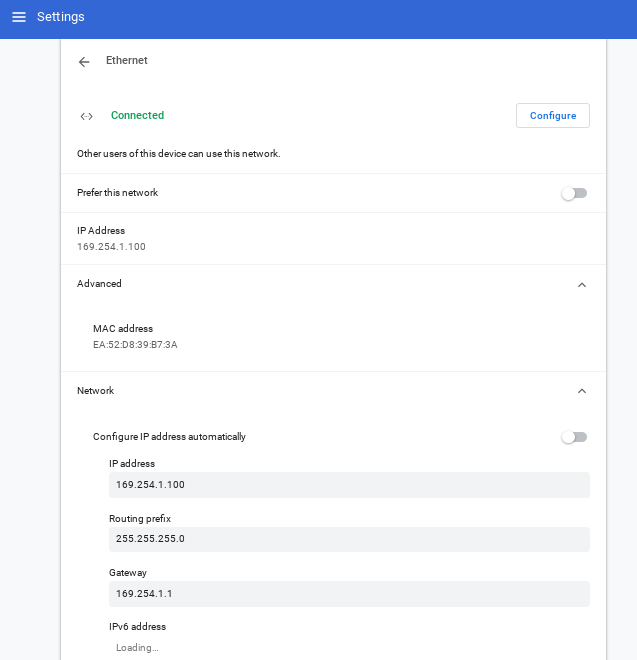
Open a browser on your Chromebook and type in the URL http://169.254.1.1:8080
On Windows 10
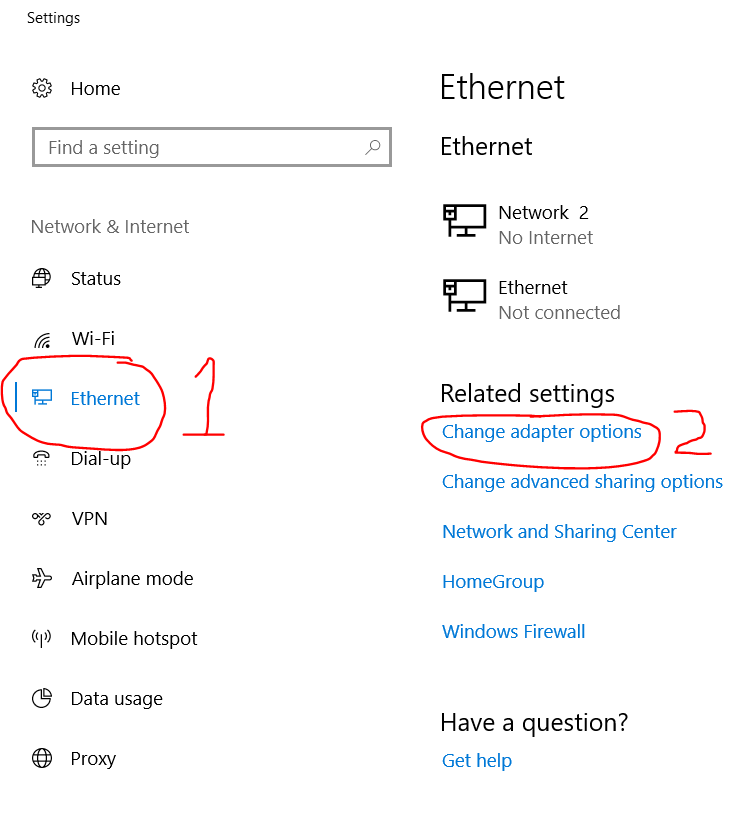
Windows 10 should automatically detect that you have a Link-Local connection and setup automatically. It can take a minute or so to happen. If it does not do it automatically, it can be done manually with:
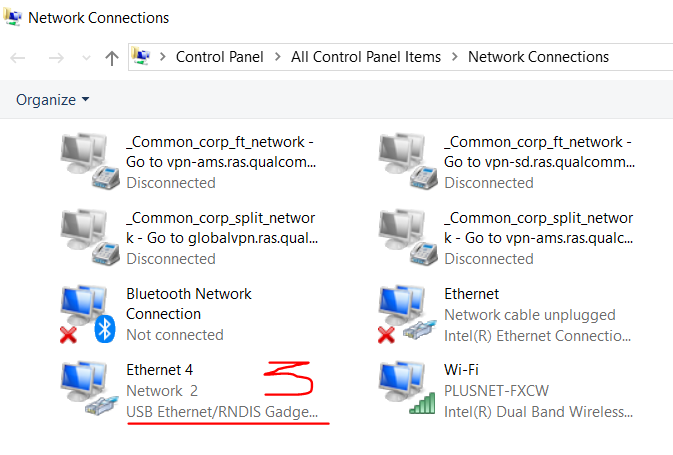
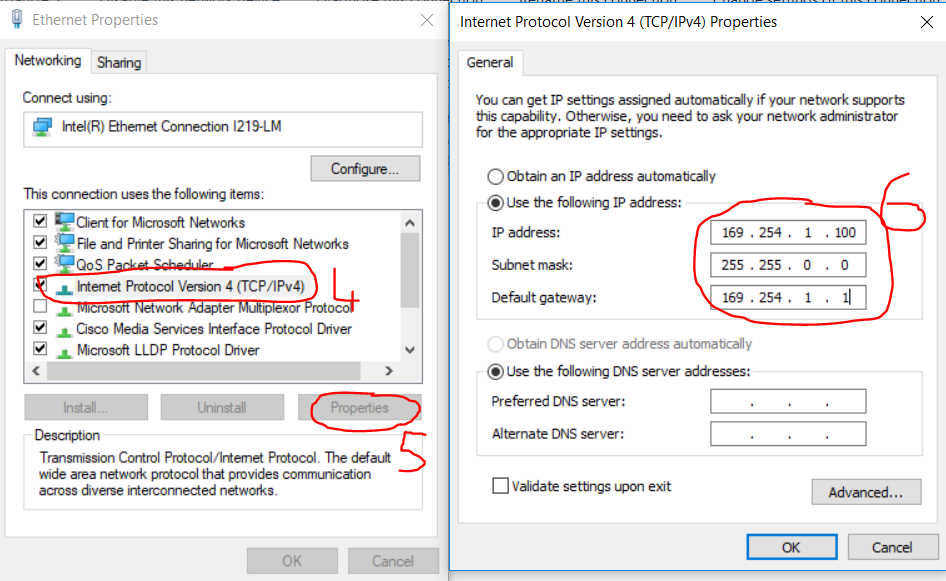
In Control Panel > All Control Panel Items > Network Connections, set the
IPv4 IP address for the USB Ethernet/RNDIS Gadget to 169.254.1.100
and the Gateway to 169.254.1.1
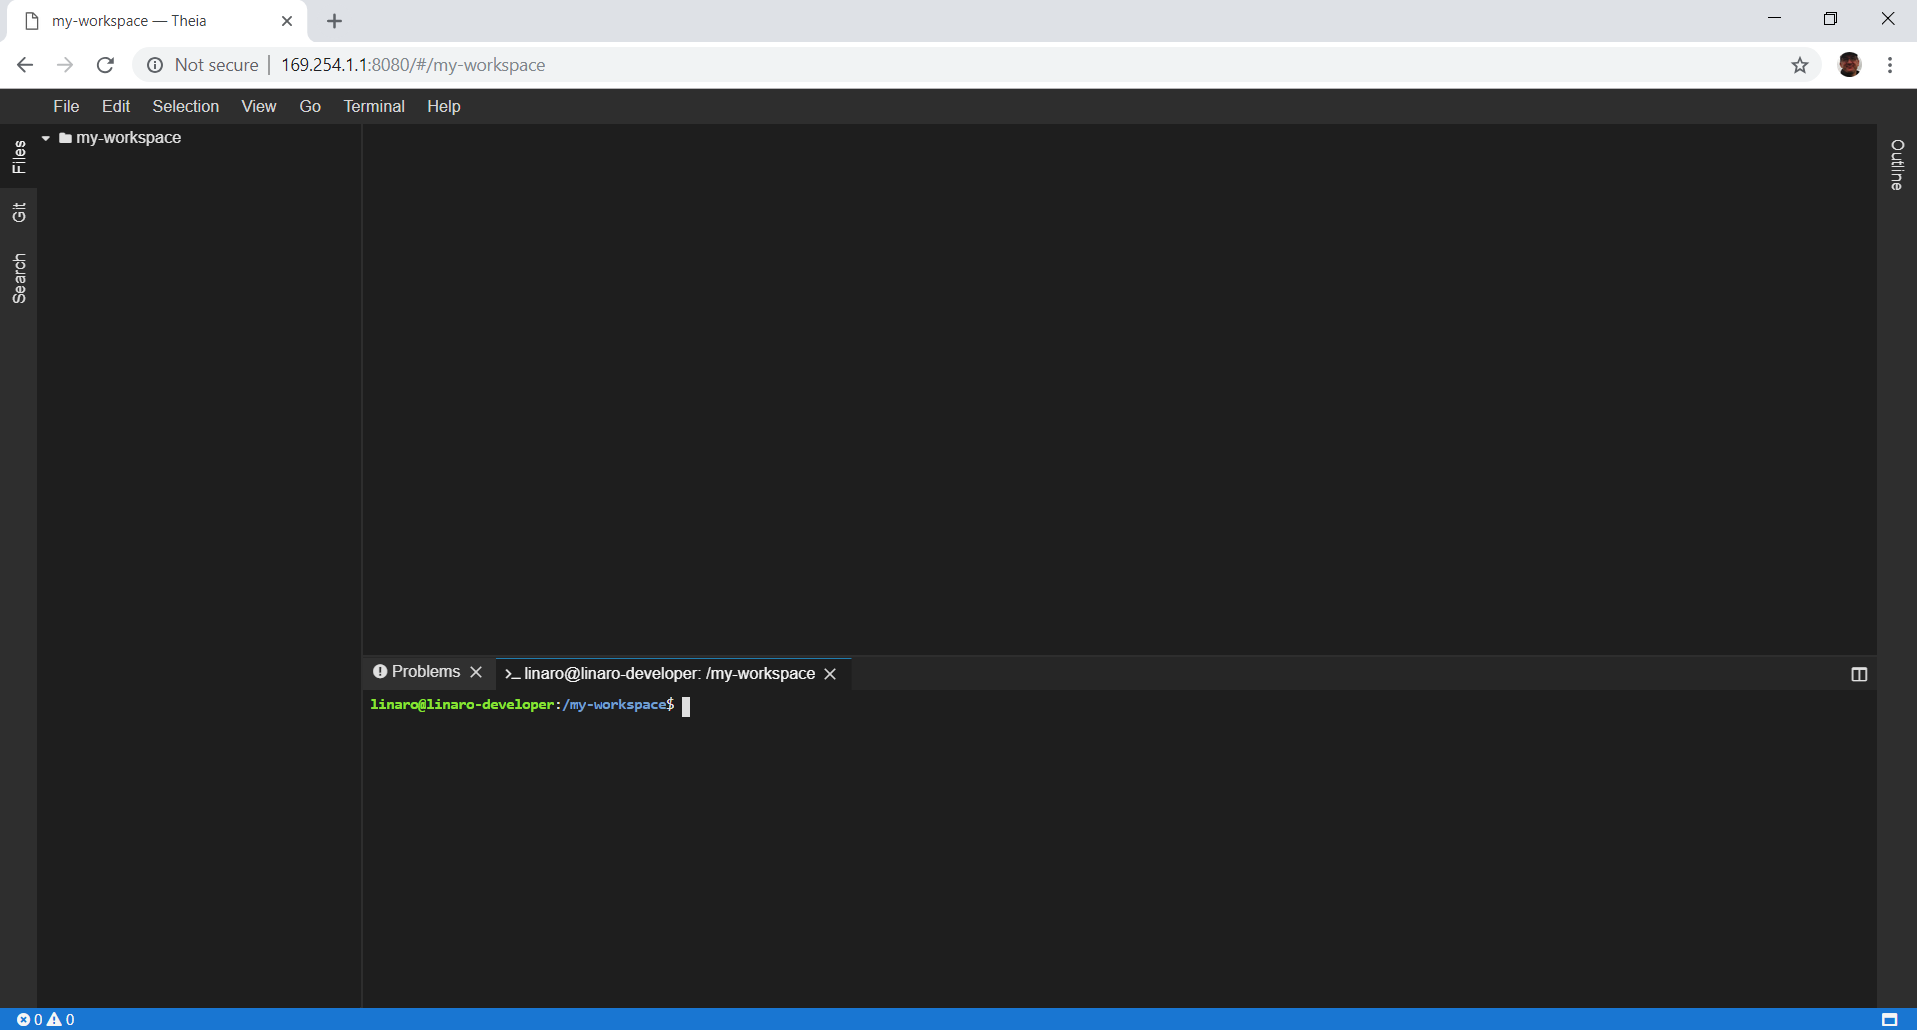
Open a browser on your PC and type in the URL http://169.254.1.1:8080
On Linux
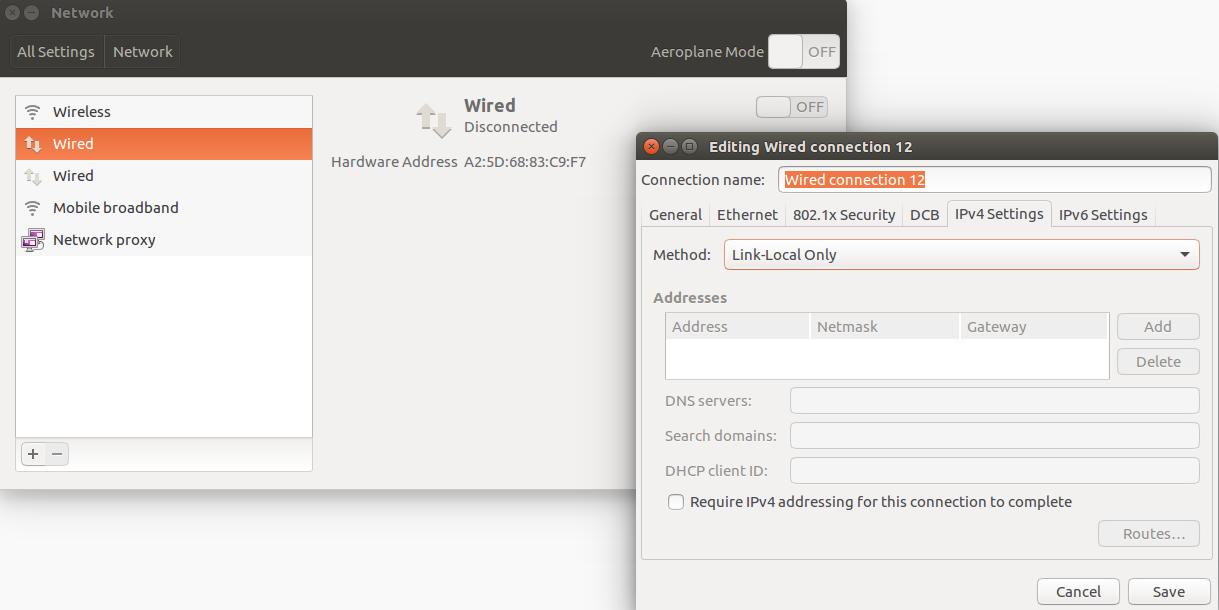
Set the “Wired” connections IPv4 Settings to “Link-Local Only”
Open a browser on your PC and type in the URL http://169.254.1.1:8080
Using the IDE
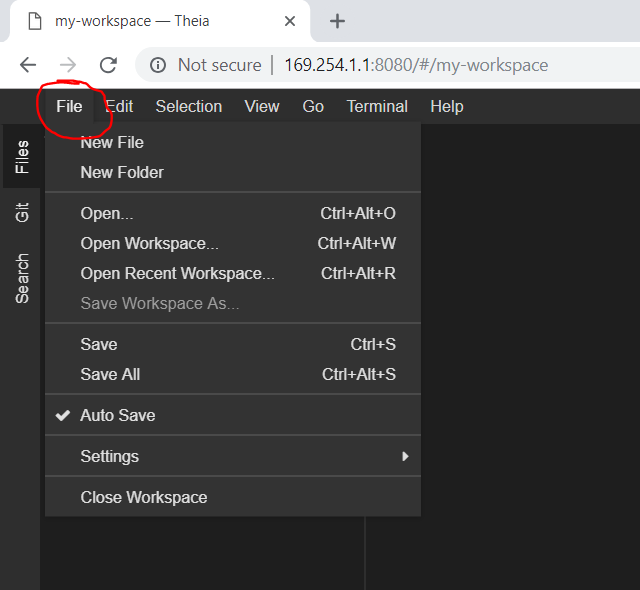
The first time the Web IDE is opened it will start with a blank “my-workspace”
To get started creating code, select “New File” from the file pulldown menu “File” menu.
To run your new program make sure there is a terminal window open to type the command. If there is no terminal it can be opened from the “Terminal” pulldown menu
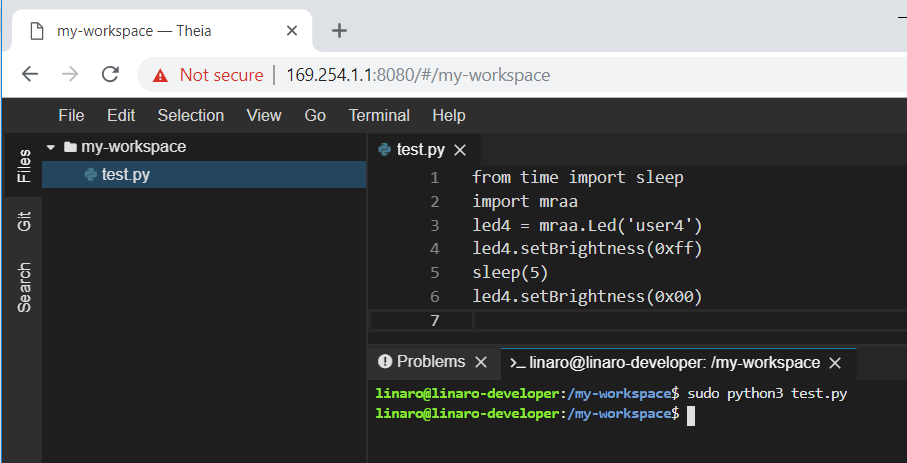
When interacting with the hardware on the Dragonboard Python must be run with
‘sudo’ e.g:
sudo python3 <filename>
Try this piece of code to flash one of the Dragonboard LEDs
from time import sleep
import mraa
led4 = mraa.Led('user4')
led4.setBrightness(0xff)
sleep(5)
led4.setBrightness(0x00)
Internet Access
To connect to the WiFi access point the Text User Interface for controlling NetworkManager can be used. This can be started with:
sudo nmtui
Captive portal
A captive portal is a web page accessed with a web browser that is displayed
to newly connected users of a Wi-Fi network before they are granted broader
access to network resources. With Project Martha a normal browser can not be
used. It is suggested that you use a text based browser in the terminal of
the Project Martha IDE. Try one of the following two programs:
links2 or lynx
Downloads
The latest builds are available here to be loaded on to the Dragonboard 410c. Choose the version based on the operating system of the host computer being used to load the image.
Mac OS
https://drive.google.com/uc?export=download&id=12rqljOy7uLq329vy_AtDHpa0mEFY2zbS
Unzip the file once it has downloaded. In the directory that is created you will
find a script that will start with flash_db410c.* but will have
different suffix depending on your chosen platform. You will need to run this
script once the Dragonbord is in fastboot mode.
It is important to do the following steps in the correct order:
1. Ensure the Dragonboard is not powered on
2. Connect a micro USB to the Dragonboard
3. Connect the other end of the USB cable to you host computer/laptop
4. Press and hold the Vol (-) button on the Dragonboard
5. While holding the Vol (-) button, power on the Dragonboard by connecting
the power cable
6. Once the Dragonboard is plugged into power, release your hold on the
Vol (-) button.
7. Run the flash_db410c.* script.
On completion, the script will reboot the Dragonboard. you are now ready for Setting up laptop.